Nothing is more frustrating than poor performance and latency spikes during night hours especially if you are a twenty four hour operation. It has become the source of headaches with many organizations and adds risk around data recovery and environment stability.
The two most common questions I receive about backups for VMware are:
“Why are VMs crashing or pausing during backups?”
“Why is there a latency spike during my backups?”
Interestingly enough both symptoms are often related and can be remediated using the same solution but first let’s understand how the two problems are related and what is causing the issue.
Background
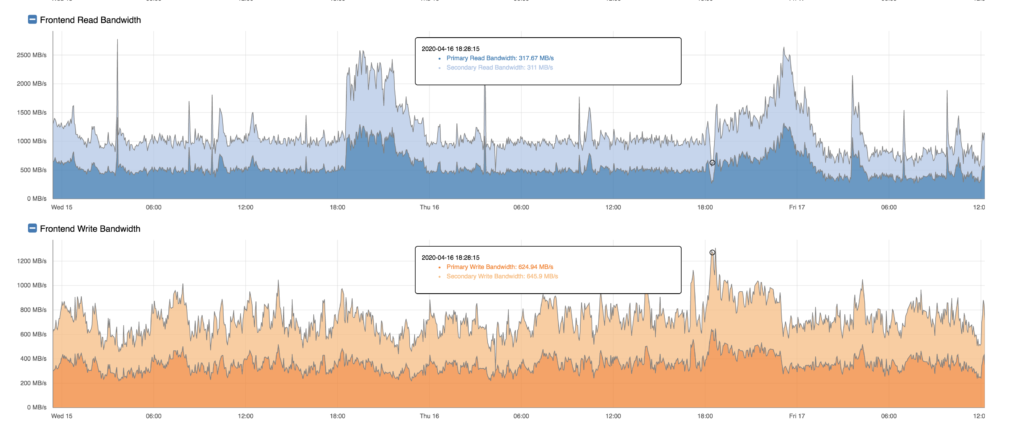
If you look at the chart below you will see that during the backup window there is a large spike in bandwidth during the same time every day (backup window):
To understand why this is happening lets look at the typical VM Backup Process:
- Take VMware Snapshot (Quiesce VM)
- Copy VM Snapshot over VM Network to backup server
- Delete Snapshot and roll any changes back into the original VMDK
There are a few challenges to this process:
The first problem is how the snapshots are taken. Traditionally, backup vendors utilize VMware Snapshots which momentarily quiesces the VM whenever a snapshot is taken or deleted (Step 1). In the case of a backup, a snapshot is taken at which point all changes are being tracked in a delta file which continues to grow while the backup copy it taking place (which could be a good amount of data depending on how long the backup takes to complete). Once the backup is complete the changes are consolidated (Delete Snapshot) into the original vmdk. In the case of backing up IO intensive machines the consolidation process can take time which can cause a longer than normal pause to the virtual machine not to mention a huge spike in bandwidth while those reads and writes are taking place on the storage subsystem. This process is taking on both the ESXi Hosts and Storage subsystem and it is often this commit process that causes the VM to crash or pause driving up latency.
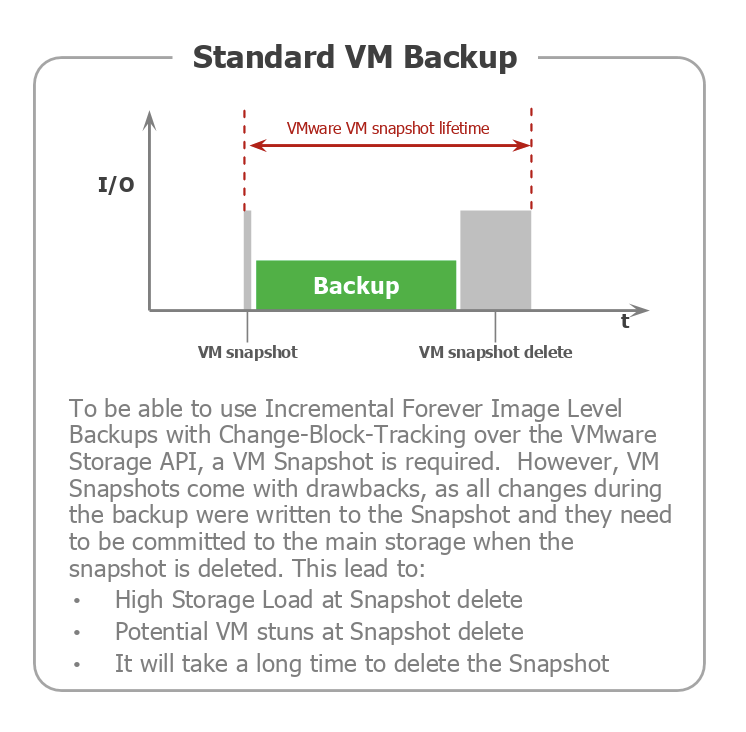
The Second behavior seen during backup windows is a large spike in bandwidth and/or latency. This is due to the fact that when traditional VMware snapshots are used that data has to be copied which results in large amounts of reads and/or writes depending on the backup repository location. This process utilizes ESXi Hosts NICS and is very inefficient for backup especially at scale since it uses a significant amount of network bandwidth during this operation.
The Solution
Modern Storage arrays such as Pure Storage Flasharray offer advanced features such as space efficient snapshotting and snapshot offload capabilities. The way a snapshot on Flasharray works is that it simply freezes the metadata that makes up a volume instead of having to copy blocks (which could consume a good deal of space) . The advantage of this is that snapshots become instant since there is no data movement and consumes very little space. The only space consumed are any changes which are also deduplicated and compressed since Pure Storage uses global deduplication and compression.
Pure Flasharray offers numerous programmability methods such as REST API which allows outside vendors to utilize the API to make calls for snapshots and data.
Now Enter Veeam Backup and Replication. In version 9.5 Veeam has added support for Pure Storage Snapshots which greatly reduces backup times and increases efficiency of backups.
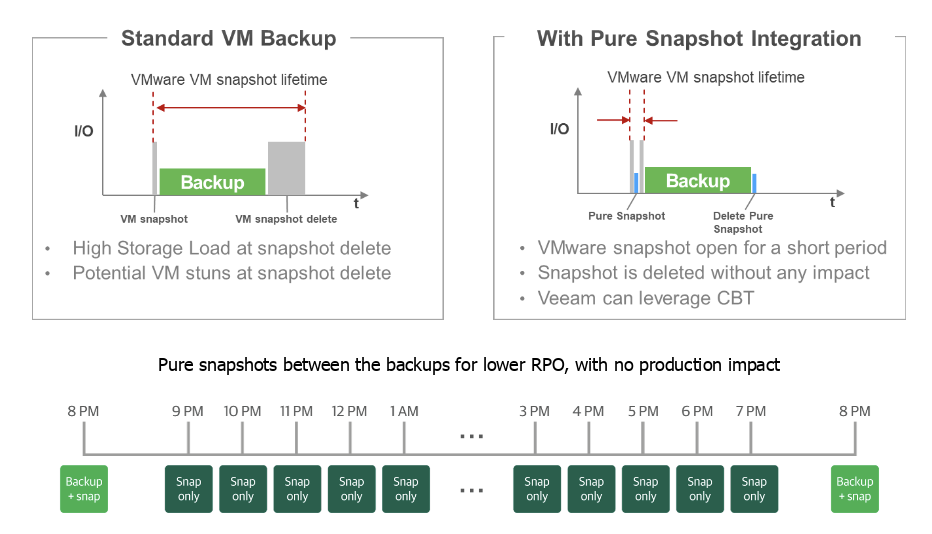
Instead of the heavy process of using VM Snapshots and then moving that data through your ESXi Host NICS the Veeam server will take the following steps:
- Take VMware Snapshot
- Immediately take a Pure Storage Snapshot.
- Immediately Delete VM Snapshot
- Copy Storage Snapshot using the storage fabric to Veeam Backup Server
- Delete Storage Snapshot
This process is much more efficient for a number of reasons:
- it eliminates stunning due to the much shorter amount of time the VM Snapshot is used (seconds instead of minutes, thus less data to commit)
- It reduces VM Network traffic by utilizing the storage fabric instead of the ESXi Host NICs.
- It eliminates the spike in latency and bandwidth on the storage due to the elimination of the read/write process of tracking VMware deltas committing snapshots.
Configuring Pure Storage Integration with Veeam
The next question I usually receive is “What is required to convert my current Veeam backup jobs to storage based snapshot backups?”. Veeam has made the process of converting very easy and you dont have to reconfigure your current backup jobs. Although I wont go through every step of configuration, I will outline the requirements to enable this technology:
- Configure proxy server to have access to your storage network.
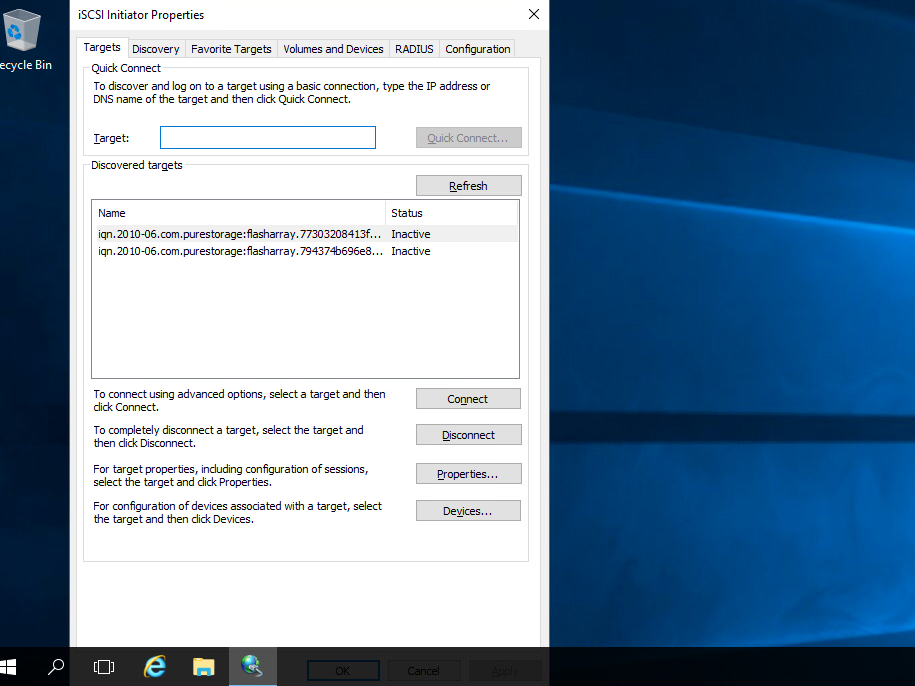
As you can see in the above screenshot my backup proxy has access to the storage arrays using an iSCSI network. This could also be accomplished over fiber.
2. Configure the proxy in Veeam Backup and Replication to use storage snapshots. (Backup Infrastructure -> right click proxy -> Properties
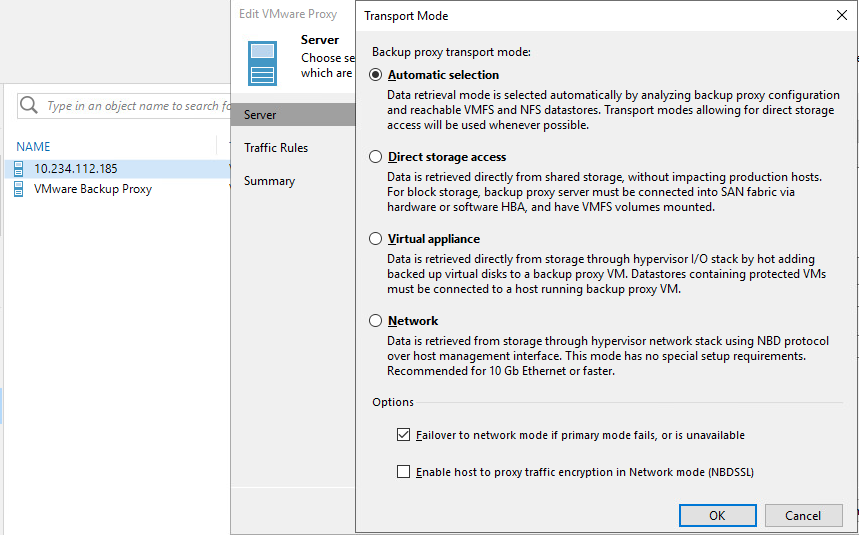
You can use either automatic selection or Direct Storage access. I recommend selecting “Failover to network mode if primary mode fails” in the event access to the storage network goes down backups will still take place.
3. Configure Storage Plugin in Veeam Backup and Replication
- Download Pure Storage for Veeam plugin
- Configure Pure Storage plugin for Veeam Backup and Replication
Storage Infrastructure -> right click -> click add storage
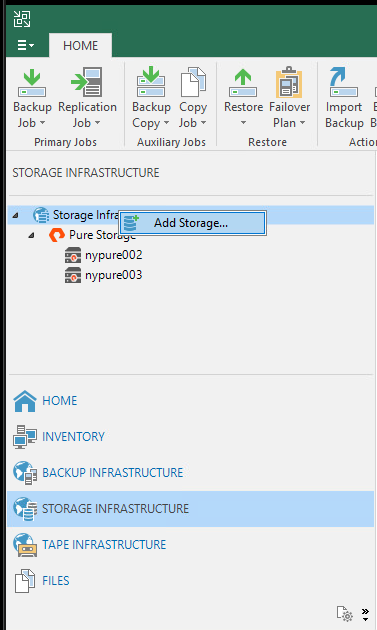
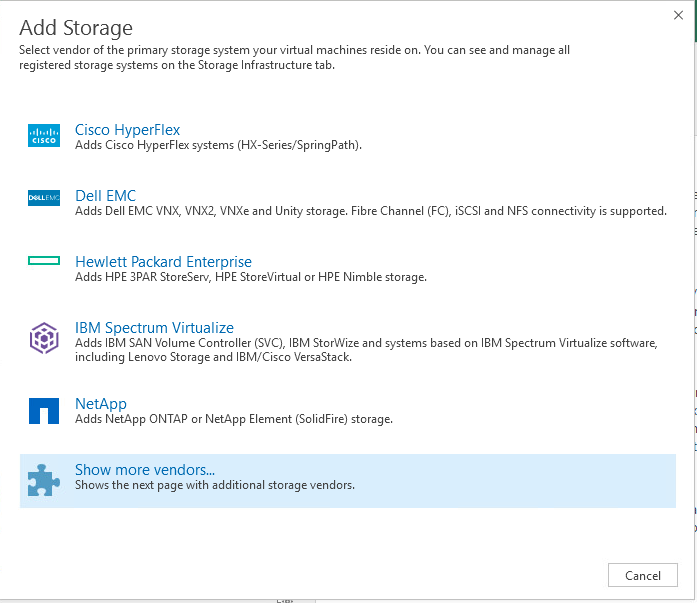
Select show more vendors
Select Pure Storage
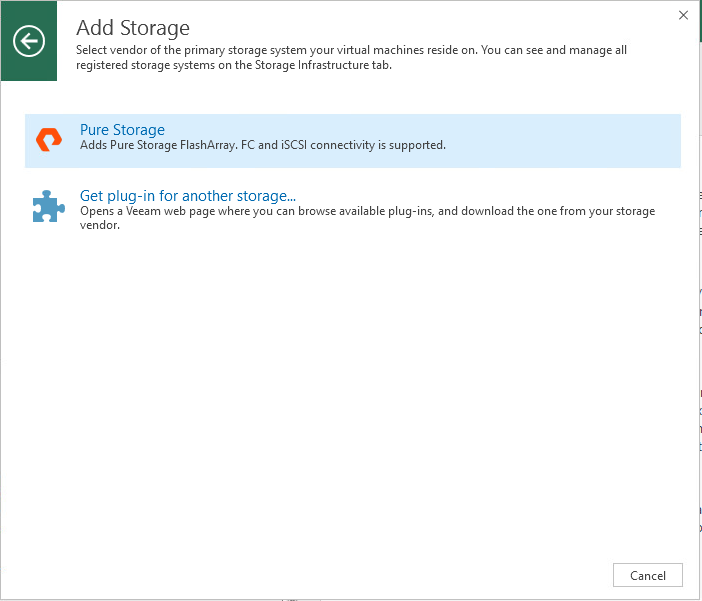
Configure Access to Pure Storage Flasharray
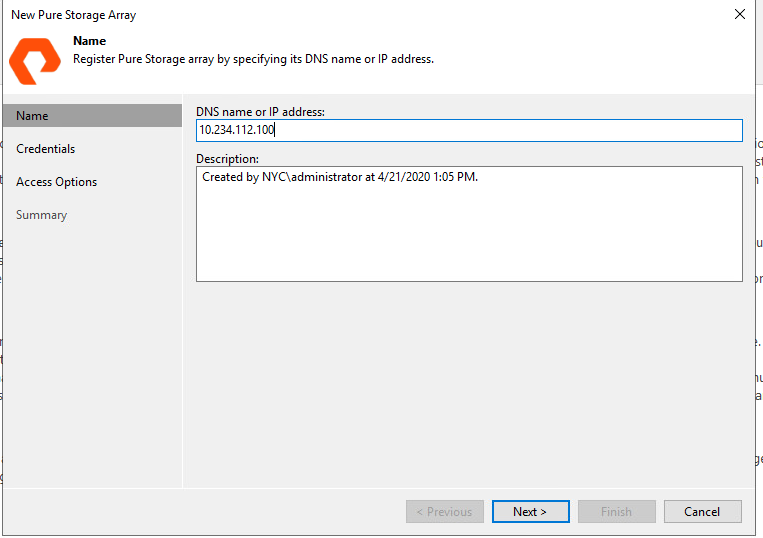
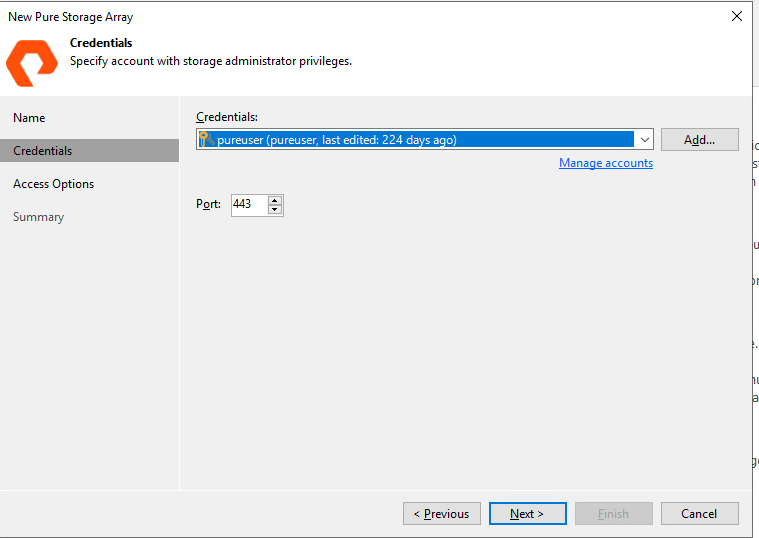
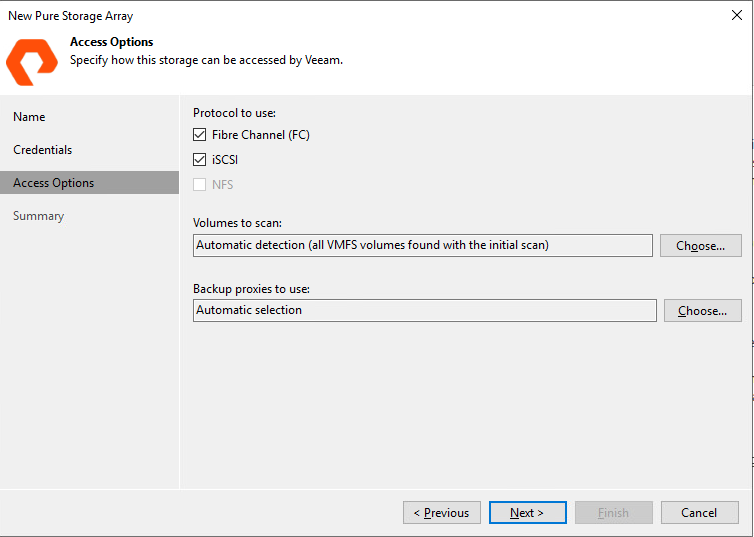
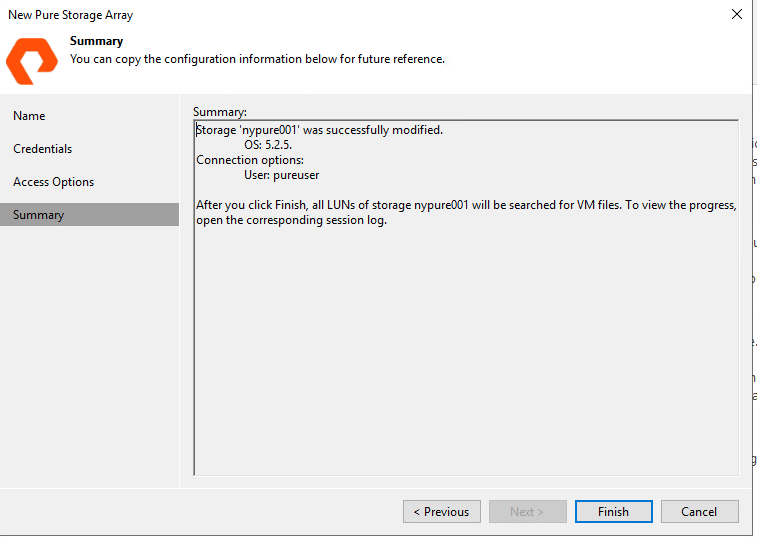
Once these steps are complete your backup jobs will now utilize Pure Storage Flasharray level snapshots with Veeam. It is that simple!
1 thought on “Eliminate Latency Spikes and VM Stunning during backups using Veeam and Pure Storage”